 English
 Pусский
 Español
You’ve signed the lease. The equipment has arrived. But every day the playground sits unassembled is a day of lost revenue—rent, staff salaries, and overhead continuing to accrue while your facility remains closed.
For mall operators, FEC owners, and childcare center directors, installation downtime is not just an inconvenience—it’s a direct hit to the bottom line. The question is: how can you reduce that downtime without compromising on safety or quality?
This guide provides a practical framework for streamlining the assembly of indoor playground equipment—from pre-delivery preparation to crew management and post-installation sign-off.
The True Cost of Installation Downtime
Before diving into solutions, it's worth understanding what downtime actually costs.
Direct costs:
-
Rent and utilities: You’re paying for space you can't use
-
Staff wages: Employees may be idle while waiting for installation to complete
-
Delayed revenue: Every day of lost ticket sales, party bookings, and F&B income adds up quickly
-
Marketing momentum: A delayed opening can miss seasonal peaks
Hidden costs:
-
Tenant relationships: In malls, neighboring stores expect foot traffic from your attraction
-
Brand perception: A prolonged “coming soon” period can create negative impressions
-
Contractor availability: Delays may push installation into higher-cost periods or require rebooking
What this means for your project: Reducing installation time by even 1–2 weeks can translate into tens of thousands of dollars in recovered revenue and avoided costs. For a mid-sized FEC with projected daily revenue of $2,000–$5,000, each week of delay represents $14,000–$35,000 in lost income. The investment in streamlining assembly pays for itself quickly.
Pre-Delivery Preparation — The Key to Faster Assembly
The single most effective way to reduce installation downtime is to complete as much preparatory work as possible before the equipment arrives. This is where most delays originate—and where the biggest time savings are found.
Critical pre-delivery tasks:
| Task | Timeline | Why It Matters |
|---|---|---|
| Flooring installation | 2–3 weeks before delivery | Impact-attenuating surfacing must be fully cured before equipment is placed on top |
| Electrical and HVAC work | 3–4 weeks before delivery | Power outlets, lighting, and ventilation need to be in place before assembly begins |
| Site measurements | Immediately after design approval | Verify that actual floorplate, ceiling height, and column locations match the design |
| Delivery route confirmation | 1–2 weeks before delivery | Ensure large components can be moved from the loading dock to the installation site without obstacles |
| Crew scheduling | 2–3 weeks before delivery | Professional installers are often booked weeks in advance—secure them early |
| Tool and supply inventory | 1 week before delivery | Have all necessary tools, PPE, and consumables on hand |
| Security and access arrangements | 1 week before delivery | Coordinate with building management for after-hours access, elevator use, and loading dock availability |
The “why” behind the planning: Studies of construction project delays consistently show that poor site preparation is a leading cause of schedule overruns. The same principle applies to playground installation. When flooring isn’t ready, or electrical work isn‘t complete, the installation team can’t proceed—and you’re paying for idle labor while the clock ticks.
The Assembly Process — Where to Save Time Without Cutting Corners
Once the equipment arrives and site preparation is complete, the assembly process itself offers several opportunities for time savings.
Conduct a thorough inventory check
Before assembly begins, verify that all components—frames, padding, fasteners, nets, decorative elements—are present and accounted for. Missing parts are one of the most common causes of installation delays. Report shortages immediately so replacements can be expedited. This step may take 2–4 hours, but it can prevent days of downtime caused by missing components discovered halfway through assembly.
Organize components by assembly zone
Group parts according to their location in the final layout. This reduces the time workers spend searching for the right piece and minimizes cross-traffic on the installation site. A well-organized site is a faster site.
Use a phased approach
Break the installation into logical phases:
-
Phase 1: Structural frame assembly
-
Phase 2: Deck and platform installation
-
Phase 3: Padding and soft coverings
-
Phase 4: Safety netting and barriers
-
Phase 5: Slides, tunnels, and interactive elements
-
Phase 6: Final inspection and cleanup
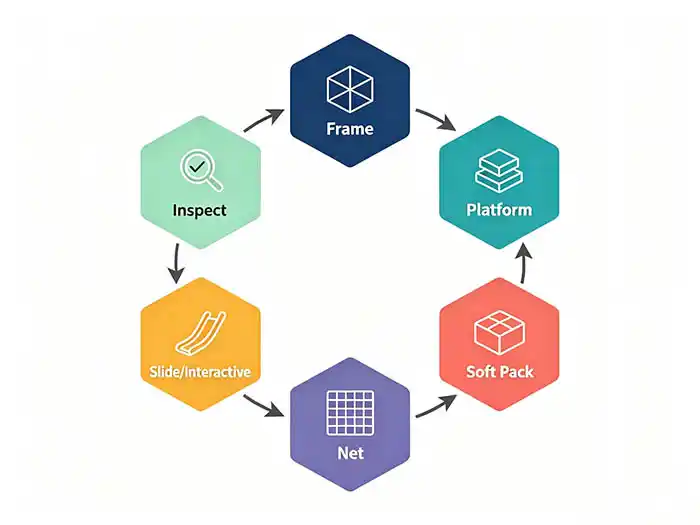
Why this works: A phased approach ensures that work proceeds in the correct sequence, minimizing rework and backtracking. It also allows you to track progress against schedule more accurately.
Parallel workstreams where possible
Not all tasks need to happen sequentially. While one crew works on structural assembly, another can prepare padding materials or assemble slide sections. Parallel workstreams can compress the overall timeline without sacrificing quality.
For a deeper understanding of the complete assembly process, see our step-by-step guide: How to Assemble a Soft Play Indoor Playground – Step by Step Guide.
The Role of Professional Installation vs. In-House Assembly
One of the most consequential decisions you'll make is whether to use professional installation services or handle assembly with in-house staff (or a local general contractor).
Table: Professional Installation vs. In-House Assembly
| Factor | Professional Installation Crew | In-House / Local Contractor |
|---|---|---|
| Experience with playground equipment | High—they’ve assembled similar structures many times | Varies—may have little or no playground-specific experience |
| Assembly speed | Faster—they know the sequence and common pitfalls | Slower—learning curve applies |
| Tool and equipment availability | Complete—they bring everything needed | May require purchasing or renting tools |
| Safety compliance | Built-in—they know ASTM and EN requirements | Must be briefed on safety standards and compliance |
| Warranty validity | Often required by manufacturer for warranty coverage | May void warranty if not using certified installers |
| Cost | Higher upfront | Lower upfront, but potentially higher total cost when accounting for delays |
| Post-installation support | Typically includes commissioning and sign-off | May require separate inspection |
When professional installation makes sense:
-
Complex, multi-level structures with interactive elements
-
Tight timelines where speed is critical
-
When warranty coverage depends on certified installation
-
When you don't have in-house staff with relevant experience
When in-house assembly may be viable:
-
Simple, single-level soft play structures
-
When you have experienced maintenance staff
-
When the timeline is flexible and the budget is extremely tight
For guidance on selecting equipment that aligns with your installation capabilities, see: Key Considerations When Purchasing Indoor Playground Equipment for Commercial Venues.
Common Causes of Installation Delays — And How to Avoid Them
Understanding the most frequent sources of delays helps you plan proactively.
| Delay Cause | Prevention Strategy |
|---|---|
| Missing or damaged parts | Conduct a thorough inventory check on delivery; inspect for damage immediately |
| Incomplete site preparation | Complete all flooring, electrical, and HVAC work before delivery |
| Poor communication with building management | Confirm access arrangements, elevator use, and delivery routes in advance |
| Insufficient tools or supplies | Inventory tools 1 week before installation; have backups for critical items |
| Unclear assembly instructions | Review manufacturer's instructions before installation begins; clarify questions in advance |
| Weather or logistics issues | Build buffer days into the schedule; monitor delivery tracking |
| Underestimated labor needs | Ensure adequate crew size; have additional staff on standby if needed |
| Late-arriving components | Split delivery into phases if necessary; prioritize essential components |
The most important rule: Build contingency time into your schedule—aim for 15–20% buffer above the estimated installation duration. If the estimate is 10 days, plan for 12. This cushion absorbs unforeseen delays without derailing your opening date.
Real-World Application — Two Installation Scenarios
Mall FEC Installation
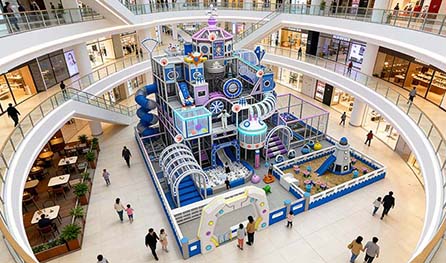
A regional mall allocates 300 square meters for a themed soft play playground with slides, nets, tunnels, and interactive elements. The mall requires installation to happen primarily during off-hours to minimize disruption to shoppers.
Strategies:
-
Professional installation crew with mall experience
-
Pre-delivery site preparation completed 2 weeks before
-
Off-hours work schedule with overlap for critical phases
-
Phased installation with progress milestones
-
Parallel workstreams for structural and decorative elements
Result: Installation completed in 12 working days versus an estimated 15 days. The mall opened on schedule for the holiday shopping season.
Daycare Center Soft Play Area
A childcare center adds a simple soft play area for toddlers—foam climbing shapes, a small slide, and padded mats. The center has a maintenance staff member with basic handyman skills.
Strategies:
-
In-house installation with supervision by the equipment supplier
-
All site preparation completed before delivery
-
Simple, flat-pack design with minimal fasteners
-
Installation scheduled during a slow week when the center is closed for a holiday
Result: Installation completed in 3 days with no surprises. The center saved on professional installation costs while maintaining quality.
For more on selecting the right attraction type for your space and traffic profile, see: Comparing Attraction Types for Mall-Based FECs.
Next Steps — From Installation to Operation
Once assembly is complete and the safety inspection has been signed off, the focus shifts to operational readiness. Training staff on safety procedures, setting up cleaning protocols, and establishing a maintenance schedule should follow immediately. A smooth installation process sets the foundation for a smooth operation.
Understanding how to streamline assembly is the first step. The next logical step is evaluating how different equipment configurations—from compact toddler zones to multi-level adventure structures—align with your available space, timeline, and operational goals. You can review Xingjian's indoor playground solutions to understand how modular designs and professional installation support can help you open faster.
Related Reading
-
How to Assemble a Soft Play Indoor Playground – A Step-by-Step Guide
-
How to Design an Engaging Indoor Play Space for a Shopping Mall
-
Key Considerations When Purchasing Indoor Playground Equipment for Commercial Venues
-
Comparing Attraction Types for Mall-Based FECs – Soft Play vs. Trampoline Parks vs. Ninja Courses
-
Safety Standards for Indoor Playground Equipment – What Every Operator Should Know
This article is part of Xingjian’s technical content library. No direct sales or pricing information is included. All technical discussions aim to help you make informed purchasing decisions.